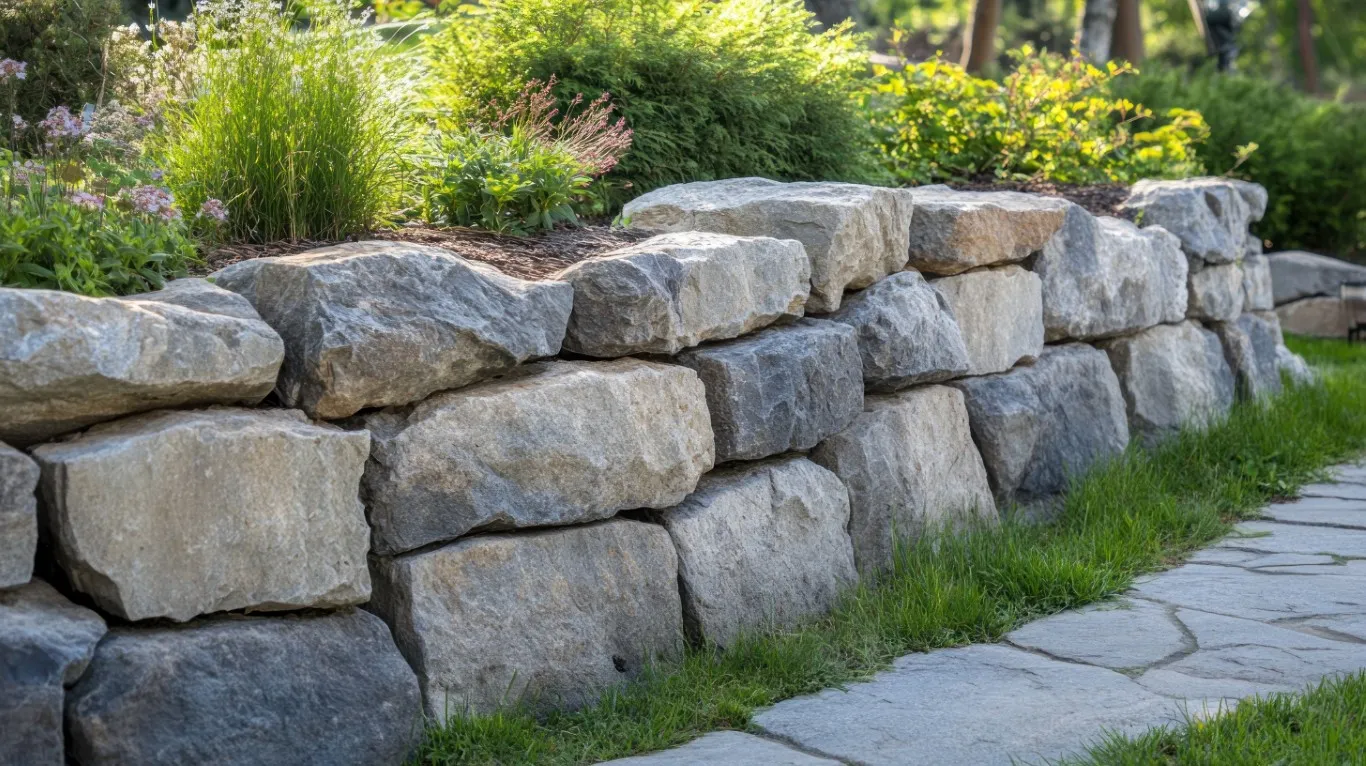


Picture this: you’re standing in your Utah Valley backyard, looking at that sloping hillside and imagining the level terrace space where your kids could play safely, where you could add garden beds, or where you could finally create that outdoor living space your family deserves. A retaining wall can transform unusable slope into functional, beautiful space that adds value to your home and creates memories for years to come. But here’s what most DIY guides won’t tell you upfront: the difference between a wall that lasts 20+ years and one that fails within three seasons comes down to what happens before you ever place the first block.
At Utah Valley Landscaping, we’ve seen countless homeowners tackle retaining wall projects with enthusiasm, only to face costly failures because they skipped the most critical step: proper soil analysis. The reality is that understanding your soil conditions determines everything else, from whether you should DIY or call a professional, to what materials will work, to how much drainage you’ll need. This guide takes you beyond basic construction steps to help you make informed decisions about your retaining wall project, whether you’re planning to build it yourself or hire experienced professionals. We’ll walk you through the soil-first approach that separates walls that last from those that don’t, give you a clear framework for deciding when to DIY versus when to call in experts, and show you the construction details that builders don’t always share.
Understanding Your Soil: The Foundation of Retaining Wall Success
Your soil type determines more about your retaining wall than any other single factor, yet most construction guides skim right past this crucial element. Utah Valley soils vary dramatically, from expansive clay that swells when wet and shrinks when dry, to sandy soils with excellent drainage, to rocky mountain terrain that presents its own challenges. Before you choose materials, calculate costs, or mark out your wall location, you need to understand what you’re building into and building on.
Clay soils, common throughout Utah County and particularly in areas like Highland and Alpine Utah, create significant lateral pressure when saturated. This pressure can push walls outward and cause failure even when the wall construction itself is solid. Clay also has poor drainage characteristics, meaning water accumulates behind walls rather than filtering through naturally. If you have clay soil, expect to invest more in drainage systems, potentially need stronger wall reinforcement, and consider professional engineering for walls over three feet.
Sandy and loamy soils drain well and exert less lateral pressure, making them more forgiving for DIY projects. However, sandy soil has lower bearing capacity, meaning your foundation needs to be wider to distribute the wall’s weight. Rocky soils present excavation challenges but often provide excellent stability once properly prepared. The key is knowing what you’re dealing with before you design your wall.
You can conduct a basic soil test yourself by digging a hole about two feet deep in the area where your wall will sit. Examine the soil layers, noting color changes, moisture levels, and composition. Grab a handful of moist soil and squeeze it: clay forms a tight ball that holds its shape, loam forms a ball that crumbles when poked, and sand won’t hold together at all. For walls over four feet or any project involving significant investment, professional soil testing costs between $300-800 and provides detailed information about bearing capacity, expansion potential, and drainage characteristics. This investment can save thousands in future repairs.
According to the International Code Council, soil bearing capacity typically ranges from 1,500 pounds per square foot for soft clay to 12,000+ pounds per square foot for solid rock. Your wall foundation must be designed to match your specific soil conditions. Expansive soils, identified by a plasticity index over 15, require special consideration including deeper foundations below the frost line (typically 36 inches in northern Utah County, 30 inches in southern areas) and enhanced drainage systems.
Critical Decision Point: Can You DIY This Retaining Wall?
Not every retaining wall is a DIY project, and attempting one that exceeds your capabilities can result in structural failure, property damage, and significant financial loss. The decision to DIY or hire professionals should be based on objective criteria, not just enthusiasm or budget constraints. Understanding these thresholds helps you make the right choice for your specific situation.
Wall height is the primary determining factor. Walls under three feet in height are generally considered DIY-friendly for homeowners with moderate construction skills, assuming other factors are favorable. Walls between three and four feet enter a gray zone where success depends heavily on soil conditions, drainage complexity, and your experience level. Walls over four feet almost always require professional engineering and installation, both for structural integrity and legal compliance. In Utah County, retaining walls over four feet typically require building permits and engineered plans stamped by a licensed structural engineer.
Soil conditions dramatically affect DIY viability. If your basic soil test reveals sandy or loamy soil with good drainage, a three-foot wall becomes much more manageable. But expansive clay, high water tables, or slopes exceeding 2:1 (rise to run) push projects firmly into professional territory regardless of wall height. According to the American Society of Civil Engineers, retaining walls in expansive soils experience failure rates three to four times higher than those in stable soils when proper engineering isn’t applied.
Consider drainage complexity honestly. If your wall location has natural springs, poor drainage from uphill areas, or sits in a low spot where water accumulates, the drainage system becomes as important as the wall itself. Simple applications where water naturally drains away are DIY-friendly. Complex situations with multiple water sources or poor natural drainage require professional design.
Legal requirements vary by municipality within Utah Valley. Most cities require permits for walls over four feet, and some require them for any wall over three feet or any wall supporting significant load (like a driveway or structure). Wall setback requirements from property lines typically range from six inches to several feet depending on wall height. Check with your local building department before starting any retaining wall project. Unpermitted walls can create liability issues, complicate future home sales, and require costly removal or remediation.
Here’s a practical decision framework: You can likely DIY if your wall is under three feet tall, you have stable soil with good drainage, the slope is moderate (less than 2:1), you’re comfortable with physical labor and following detailed instructions, and local codes don’t require permits. You should hire professionals if your wall exceeds four feet, you have clay soil or poor drainage, the slope is steep, property lines or structures are involved, or local codes require engineering and permits. For projects in that middle zone (three to four feet with moderate conditions), consider professional consultation even if you do the installation work yourself.
Utah Valley Landscaping offers free consultations to help Utah homeowners assess their retaining wall needs and determine the best approach for their specific situation.
Types of Retaining Walls: Matching Material to Your Conditions
Choosing the right retaining wall type for your situation involves balancing structural requirements, aesthetics, cost, and longevity. Each wall type has optimal applications, and selecting one that doesn’t match your conditions leads to premature failure or unnecessary expense. Understanding these options helps you make informed decisions whether you’re building yourself or working with contractors.
Gravity walls rely on their own weight to resist soil pressure, making them the simplest type structurally. These include stacked stone walls, some concrete block systems, and timber walls. Gravity walls work well for heights under four feet in stable soils with good drainage. Natural stone gravity walls create beautiful, rustic aesthetics that complement Utah Valley’s mountain backdrop and typically cost $25-50 per square foot installed. Their main limitation is height: they become impractically wide (and expensive) above four feet because they need increasing mass to resist increasing soil pressure.
Concrete block retaining wall systems (like segmental retaining walls or SRW systems) are the most popular choice for residential applications. These engineered block systems include built-in setback angles and interlocking features that create strong, stable walls suitable for heights up to six to eight feet without reinforcement. Costs range from $15-30 per square foot for DIY installation, $30-60 per square foot professionally installed. These systems work in most soil conditions when properly designed and installed, typically last 50-75 years with minimal maintenance, and offer numerous aesthetic options from natural stone appearance to contemporary clean lines. They’re ideal for DIY builders tackling walls under four feet in moderate soil conditions.
Timber retaining walls use large treated lumber (typically 6×6 or larger) stacked horizontally and anchored with vertical posts or deadmen (horizontal anchors extending back into the retained soil). These walls create a natural, informal look that works well in wooded or casual landscape settings. Costs run $10-25 per square foot for DIY installation. However, even pressure-treated lumber degrades over time, giving timber walls shorter lifespans of 15-25 years depending on wood type and moisture exposure. They’re best for shorter walls (under three feet) in well-drained situations where the rustic aesthetic fits your landscape vision.
Cantilever walls use reinforced concrete in an L or inverted T shape, with the horizontal base extending back under the retained soil. The weight of the soil on the base helps stabilize the wall, creating an efficient design for taller walls. These walls require professional engineering and installation, cost $50-100+ per square foot, but handle heights of six to twelve feet effectively. They’re the right choice for taller walls, poor soil conditions requiring maximum structural strength, or situations where a thin wall profile is needed (the wall face can be much thinner than a gravity wall of equivalent height).
Poured concrete walls offer maximum strength and durability but require professional installation including concrete forming, reinforcement placement, and proper curing. Costs run $60-150+ per square foot depending on height and finish. These walls last 50-100 years and handle any residential situation, but their utilitarian appearance often requires facing with stone or other materials for aesthetic appeal. They’re typically specified for the most challenging applications: very tall walls, very poor soils, or situations with extreme loading.
The natural stone walls common in Alpine and Highland Utah provide unmatched aesthetic appeal but require skilled masons and cost $75-150+ per square foot professionally installed. True dry-stacked stone walls are gravity walls limited to about four feet in height. Taller stone walls typically use mortared stone facing over a concrete block or poured concrete structural core.
For most Utah Valley homeowners tackling walls under four feet with typical soil conditions, concrete block systems offer the best balance of DIY-friendliness, cost, durability, and appearance. Our experience at Utah Valley Landscaping shows these systems consistently perform well across Utah County’s varied conditions when properly installed with adequate drainage.
Step-by-Step: Building Your Retaining Wall
Building a retaining wall that lasts requires careful attention to each construction phase. Cutting corners or rushing through critical steps creates problems that may not appear for months or years but inevitably lead to failure. This section walks through proper construction sequences for a concrete block retaining wall, the most common DIY type, with principles that apply to other wall types as well.
Permit Acquisition and Site Preparation
Before breaking ground, verify permit requirements with your local building department. In most Utah County municipalities, walls over four feet require permits and engineered plans. Even if your wall doesn’t require permits, checking local setback requirements protects you from future complications. Call 811 (Blue Stakes of Utah) at least two business days before digging to have underground utilities marked. This free service prevents dangerous and costly utility strikes.
Mark your wall location with stakes and string, ensuring it’s straight or follows smooth curves. Measure and verify dimensions, checking that the wall location respects property lines and setback requirements. For curved walls, use a garden hose or flexible material to establish smooth curves before marking.
Excavation and Base Preparation
Proper foundation depth is critical and frequently underestimated by DIY builders. The general rule is to bury the first course at a depth equal to one inch for every eight inches of wall height. For a 32-inch tall finished wall, bury four inches of the first course. Add six inches for the gravel base, meaning you’ll excavate a trench about ten inches deep. In areas with frost heaving concerns (most of Utah County), go deeper, placing the base below the frost line.
Excavate the trench six to twelve inches wider than your block depth to allow room for drainage gravel behind the wall. Create a level trench bottom, checking with a four-foot## Conclusion
Building a retaining wall that lasts requires careful attention to soil analysis, proper drainage design, and a solid foundation. Whether you’re tackling a small garden wall or considering a more complex project, understanding these fundamentals will help you make informed decisions about materials, construction methods, and when professional expertise becomes essential. If you’re planning a retaining wall project in Utah County and want the confidence of professional craftsmanship backed by our 1-year warranty, reach out to Utah Valley Landscaping for a free consultation tailored to your property’s unique needs.
Frequently Asked Questions
Q: How high can I build a retaining wall without a permit in Utah County?
A: Most municipalities in Utah County allow retaining walls up to 4 feet in height without a permit, but regulations vary by city and depend on factors like setback distance and slope conditions. Alpine, Highland, and other cities may have specific requirements, so always check with your local building department before starting construction. Walls over 4 feet typically require engineered plans and permits due to the increased structural loads and safety considerations.
Q: What type of retaining wall is best for Utah’s freeze-thaw cycles?
A: Concrete block and natural stone retaining walls perform exceptionally well in Utah’s climate when properly installed with adequate drainage and a gravel base below the frost line. The key is ensuring water doesn’t get trapped behind the wall where it can freeze and expand, which means installing drainage pipes, weep holes, and backfilling with gravel rather than soil. Timber walls are less ideal for Utah County due to moisture fluctuations and shorter lifespan.
Q: How much does it cost to professionally install a retaining wall in Utah Valley?
A: Professional retaining wall installation in Utah County typically ranges from $25 to $75 per square foot depending on materials, wall height, site accessibility, and drainage complexity. A basic 3-foot tall concrete block wall might cost $3,000 to $5,000 for a 20-foot section, while natural stone or walls requiring significant excavation and engineering can run considerably higher. Getting multiple quotes from licensed contractors helps you understand fair pricing for your specific project.
Q: When should I hire a professional instead of building a retaining wall myself?
A: Hire a professional contractor for any retaining wall over 4 feet tall, walls on steep slopes, projects requiring significant drainage solutions, or when dealing with unstable soil conditions common in parts of Utah County. Professional expertise becomes essential when permits and engineered plans are required, or when the wall will support structures like patios, driveways, or buildings. DIY projects work best for simple garden walls under 3 feet on relatively flat, stable ground.
Q: How long does a properly built retaining wall last?
A: A well-constructed retaining wall with proper drainage can last 20 to 50 years or more depending on materials and maintenance. Concrete block walls typically last 50-100 years, natural stone walls can last a century or longer, while timber walls generally need replacement after 15-25 years in Utah’s climate. The longevity depends heavily on drainage quality, as water infiltration is the primary cause of premature retaining wall failure.
Q: What drainage system do I need behind a retaining wall?
A: Every retaining wall needs a gravel backfill layer at least 12 inches wide directly behind the wall, combined with a perforated drainage pipe (4-inch diameter minimum) placed at the base to collect and redirect water away from the structure. Weep holes should be installed every 4 to 6 feet along the wall’s base to allow water to escape, and the top of the backfill should be capped with landscape fabric and soil to prevent fine particles from clogging the drainage system over time.
Q: Can I build a retaining wall on a property line in Utah County?
A: Building a retaining wall directly on a property line typically requires written permission from your neighbor and may still need setback approval from your local municipality. Most Utah County cities require retaining walls to be set back at least a few feet from property lines, especially for taller structures. Always verify property boundaries with a survey and consult both your neighbor and local building department before construction to avoid costly disputes or required removal.