

The Real Cost of Getting It Wrong
Here’s a statistic that should make any homeowner pause: according to the National Association of Home Builders, nearly 35% of retaining walls fail within the first five years due to improper construction. The average repair cost for a failed retaining wall ranges from $5,000 to $15,000, and that doesn’t account for damage to your home’s foundation, landscaping, or neighboring properties that can push costs even higher.
At Utah Valley Landscaping, we’ve seen beautiful hillside properties in Alpine and Highland turn into expensive headaches because homeowners skipped critical steps or underestimated the complexity of retaining wall construction. We’ve also witnessed stunning transformations where properly built walls have created usable outdoor living spaces from previously unusable slopes, adding both function and significant value to Utah County homes.
The difference between a wall that lasts 50 years and one that fails in five comes down to three things: proper material selection for your specific conditions, correct foundation and base preparation, and adequate drainage systems. This guide will walk you through the complete decision-making and construction process, helping you determine whether your project is DIY-appropriate or requires professional help.
We’ll cover the two most critical mistakes that cause retaining wall failures (foundation prep and drainage), give you a clear framework for choosing materials based on your specific soil conditions and slope severity, and provide the step-by-step process we use at Utah Valley Landscaping for walls that stand the test of time. Whether you’re creating a terraced garden space or solving an erosion problem on your property, understanding these principles will save you thousands and create an outdoor space your family can enjoy for decades.
Before You Dig: Is Your Project DIY-Appropriate? (Decision Framework)
Not every retaining wall project should be a DIY endeavor, and knowing the difference before you start can save you from costly failures. The decision depends on five key factors that determine both safety and code compliance.
Wall Height Assessment: Any wall under 4 feet is generally considered DIY-appropriate in most Utah jurisdictions, though you should always verify local codes. Walls over 4 feet typically require engineering plans, permits, and professional construction. Even a 5-foot wall holds back approximately 5,000 pounds of soil pressure per linear foot, a force that demands precision engineering.
Slope Severity Evaluation: If your slope drops more than 2 feet over a 10-foot horizontal distance, you’re dealing with a severe grade that may require terraced walls or professional assessment. Mild slopes (under 1 foot drop per 10 feet horizontal) are generally straightforward. Moderate slopes between these ranges can work for experienced DIYers but require careful attention to drainage and setback.
Soil Type Considerations: Grab a handful of soil from your site and squeeze it. Clay soil that forms a ball and doesn’t crumble easily creates the most pressure behind walls and requires superior drainage systems. Sandy soil that falls apart immediately drains better but may require deeper foundations. Rocky soil presents excavation challenges that often necessitate professional equipment.
Budget Reality Check: A professionally built retaining wall costs $25 to $80 per square foot in Utah County, depending on materials and site conditions. DIY projects typically cost $10 to $30 per square foot in materials alone but require significant time investment (expect 40-60 hours for a typical residential project) and tool rental ($200-500 for a weekend).
Quick Self-Assessment Quiz: Answer these questions to determine your project’s complexity:
- Is the finished wall height under 4 feet? (No = call pros)
- Are you physically able to move 50-pound blocks repeatedly? (No = call pros)
- Do you have at least two capable helpers? (No = reconsider)
- Is the soil behind the wall relatively stable (no springs or heavy water flow)? (No = call pros)
- Are you comfortable working with levels, string lines, and precise measurements? (No = this will be challenging)
If you answered “call pros” to two or more questions, your project likely exceeds comfortable DIY territory. At Utah Valley Landscaping, we offer free project assessments to help homeowners make informed decisions about their retaining wall needs.
Choosing Your Retaining Wall Type: Material Comparison by Use Case
The right material for your retaining wall depends on your budget, aesthetic preferences, soil conditions, and DIY skill level. Here’s how each major option performs in real-world scenarios.
Concrete Block Systems (Interlocking/Segmented): These modular units represent the most popular DIY option and account for approximately 60% of residential retaining walls nationwide. They cost $10-25 per square foot for materials and require no mortar, making them accessible to homeowners with basic construction skills. Best for walls under 4 feet on mild to moderate slopes with good drainage. These systems work exceptionally well in Utah’s freeze-thaw cycles because individual blocks can shift slightly without cracking. Expected lifespan: 40-60 years with proper installation.
Timber Walls: Pressure-treated lumber or landscape timbers cost $8-15 per square foot and offer the most budget-friendly option. They’re ideal for short walls (under 3 feet) in garden settings or temporary applications. However, even treated wood deteriorates in Utah’s varied climate, especially with our temperature extremes and occasional heavy moisture. Expected lifespan: 10-20 years. Not recommended for critical applications or areas with heavy water exposure.
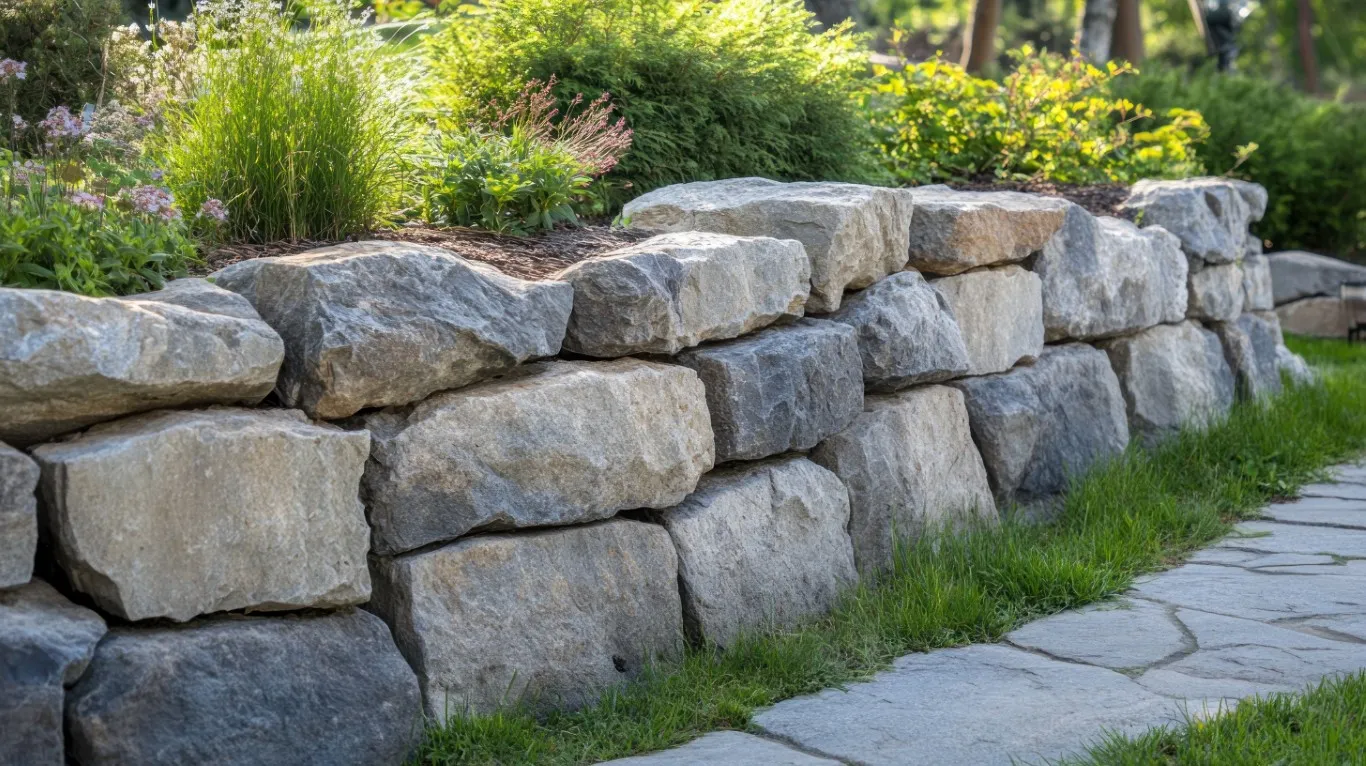
Natural Stone: Dry-stacked or mortared stone walls cost $25-50 per square foot for materials but deliver unmatched aesthetic appeal and longevity. This option requires significant skill and experience, making it better suited for professional installation unless you have masonry experience. Stone works beautifully on properties in Alpine and Highland where natural materials complement existing architecture. Expected lifespan: 75-100+ years when properly constructed.
Poured Concrete Walls: These engineered solutions cost $30-60 per square foot but handle the most challenging applications, including walls over 6 feet, severe slopes, and poor soil conditions. They require professional installation with forms, rebar placement, and proper concrete mixing. Best for structural applications where failure isn’t an option. Expected lifespan: 50-75 years.
Boulder Walls: Large boulders create natural-looking retention with costs ranging from $20-40 per square foot depending on boulder availability and access. These work exceptionally well for moderate slopes and provide excellent drainage naturally. Professional installation typically required due to equipment needs (excavators and boulder-moving machinery). Expected lifespan: 100+ years. Learn more about boulder wall applications for slope problems.
UV Landscaping’s Material Selection Matrix for Utah County:
- Clay soil with poor drainage: Segmented concrete blocks or poured concrete with extensive drainage systems
- Sandy soil with good drainage: Any material suitable for height/load requirements
- Mild slopes under 3 feet: Timber or concrete blocks work well
- Moderate to severe slopes: Concrete blocks, poured concrete, or engineered boulder walls
- Aesthetic priority properties: Natural stone or quality segmented blocks with varied textures
- Budget-conscious projects: Concrete blocks offer best value-to-longevity ratio
The material you choose directly impacts long-term success, but even premium materials fail without proper foundation and drainage, which we’ll cover in the next sections.
Critical Mistake #1: Foundation and Base Preparation Failures
The single most common reason retaining walls fail within five years is inadequate base preparation. Your wall is only as stable as the foundation beneath it, and shortcuts here guarantee eventual failure regardless of the quality materials you use.
Proper Base Requirements: Every retaining wall needs a compacted gravel base with a minimum depth of 6 inches for walls under 3 feet. For walls between 3-4 feet, increase this to 8 inches. Walls over 4 feet (requiring professional engineering) typically need 10-12 inches or more depending on soil conditions. Use 3/4-inch crushed gravel rather than pea gravel, as the angular edges lock together when compacted, creating a more stable base.
The Excavation Depth Formula: Calculate your total excavation depth using this formula: one inch of burial depth for every eight inches of exposed wall height, plus your base material depth. For example, a 32-inch exposed wall needs 4 inches of burial (32 divided by 8), plus 6 inches of base material, totaling 10 inches of excavation below your desired grade.
Compaction Techniques That Matter: Loose gravel provides no more stability than soil. After placing each 2-inch layer of base material, compact it thoroughly using a hand tamper for small projects or a plate compactor (rent for $75-100 per day) for larger installations. The material should barely shift when you jump on it. Professional installers use compaction gauges to verify 95% compaction, which significantly reduces settling over time.
Width Requirements: Your base excavation should extend at least 6 inches beyond the back of your wall to accommodate drainage material. The level pad for the first course should be slightly wider than your blocks (typically 1-2 inches on each side) to ensure proper support.
Leveling Precision: The first course of your wall must be perfectly level in all directions. Even a quarter-inch variation across a 10-foot span will magnify with each subsequent course, resulting in a visibly tilted wall. Use a 4-foot level (minimum) and check every few feet along the wall. For longer walls, use a string line and line level for overall straightness.
Real Failure Example: We recently demolished and rebuilt a 40-foot segmented block wall in Highland that had been installed on compacted soil with no gravel base. After two winters, the wall had settled unevenly by 3-4 inches in several locations, creating dangerous bulges where soil pressure was pushing blocks outward. The repair cost $8,500 compared to the $1,200 in materials and time proper base prep would have required initially.
Soil Stability Considerations: If your excavation reveals soft, organic-rich soil or clay that won’t compact properly, you’ll need to excavate deeper and replace it with compactable fill. Springs or consistently wet soil indicate groundwater issues that require professional drainage solutions beyond typical retaining wall drainage systems.
Foundation preparation isn’t glamorous work, but it’s where your wall’s longevity is truly determined. Budget at least 40% of your project time for site preparation, excavation, and base installation.
Step-by-Step Construction Process (The Right Way)
Proper retaining wall installation follows a specific sequence that shouldn’t be modified or reordered. Each step builds on the previous one, and skipping ahead creates problems that compound as you progress.
Step 1: Site Layout and String Lines (2-3 hours): Mark your wall’s front face location with stakes every 8-10 feet and string lines pulled tight between them. Use a line level to ensure your string is perfectly level or follows your desired grade. Spray paint or marking chalk along the ground provides a clear excavation guide. For curved walls, use a garden hose to establish your curve, then transfer to spray paint.
Step 2: Excavation to Proper Depth (4-8 hours depending on wall length): Dig your trench according to the formula from the previous section. Keep the excavation walls as vertical as possible and create a flat bottom. Remove roots, large rocks, or organic material that could decompose and create voids. For walls over 20 feet, consider renting a small excavator ($250-350 per day) rather than hand digging.
Step 3: Base Material Installation and Compaction (3-4 hours): Place your 3/4-inch crushed gravel in 2-inch layers, compacting each layer before adding the next. The final surface should be completely level and extend 6 inches beyond where your wall’s back face will sit. Use a straight 2×4 and level to verify flatness across the entire
Conclusion
Building a retaining wall that lasts requires careful planning, proper drainage, and attention to each construction phase. While DIY retaining walls can be rewarding projects for shorter walls under three feet, taller or more complex installations often benefit from professional expertise to ensure structural integrity and long-term performance. If you’re planning a retaining wall project in Utah County and want the confidence that comes with professional craftsmanship backed by a 1-year warranty, contact Utah Valley Landscaping for a free consultation and quote.
Frequently Asked Questions
Q: Do I need a permit to build a retaining wall in Utah County?
A: Most municipalities in Utah County require permits for retaining walls over 4 feet in height, and some require permits for any wall regardless of height. Requirements vary by city (Provo, Orem, Alpine, and Highland each have different codes), so check with your local building department before starting your project. Walls near property lines may also require setback approvals from neighbors.
Q: How much does it cost to build a retaining wall yourself vs. hiring a professional?
A: DIY retaining walls typically cost $15-25 per square foot for materials (blocks, base rock, drainage pipe, and backfill), while professional installation ranges from $35-75 per square foot depending on wall height, materials, and site accessibility. The cost difference reflects equipment rental, proper engineering for taller walls, labor, and warranty protection. For walls over 4 feet or complex sites, professional installation often provides better long-term value.
Q: What is the easiest retaining wall to build for beginners?
A: Interlocking concrete block systems (like Versa-Lok or Allan Block) are the most beginner-friendly option because they don’t require mortar, have built-in setback angles, and include clear installation guides. These systems work well for walls up to 3-4 feet and can be installed with basic tools. Timber walls are also relatively simple but have shorter lifespans, especially in Utah’s freeze-thaw climate.
Q: How long does a properly built retaining wall last?
A: Lifespan depends on materials and construction quality. Concrete block walls typically last 50-100 years, poured concrete walls 50-75 years, natural stone walls 50+ years, and timber walls 10-25 years. Proper drainage installation is the single biggest factor affecting longevity. Walls without adequate drainage often fail within 5-10 years regardless of material quality.
Q: Can I build a retaining wall on a slope without leveling the ground first?
A: No, retaining walls require a level base to distribute weight evenly and prevent tilting or collapse. Even on slopes, you must excavate to create a level trench and install a compacted gravel base. Stepped walls (where the wall follows the slope in level sections) are the proper technique for sloped terrain, with each section built on its own level foundation.
Q: What causes retaining walls to fail and lean forward?
A: The most common cause is inadequate drainage, which allows water pressure to build up behind the wall and push it forward. Other failure causes include insufficient base preparation, improper backfill material (using clay instead of gravel), lack of geogrid reinforcement on tall walls, and frost heave in areas without proper depth. Most failures occur within the first 3-5 years if construction shortcuts were taken.
Q: How deep should the base be for a retaining wall in Utah’s climate?
A: In Utah County, your base trench should extend below the frost line (typically 36 inches deep) for walls over 3 feet tall to prevent frost heave damage during winter months. The compacted gravel base itself should be 6-8 inches deep for walls up to 3 feet, and proportionally deeper for taller walls. The first course of blocks should also be buried, with only 6-8 inches visible above grade for maximum stability.