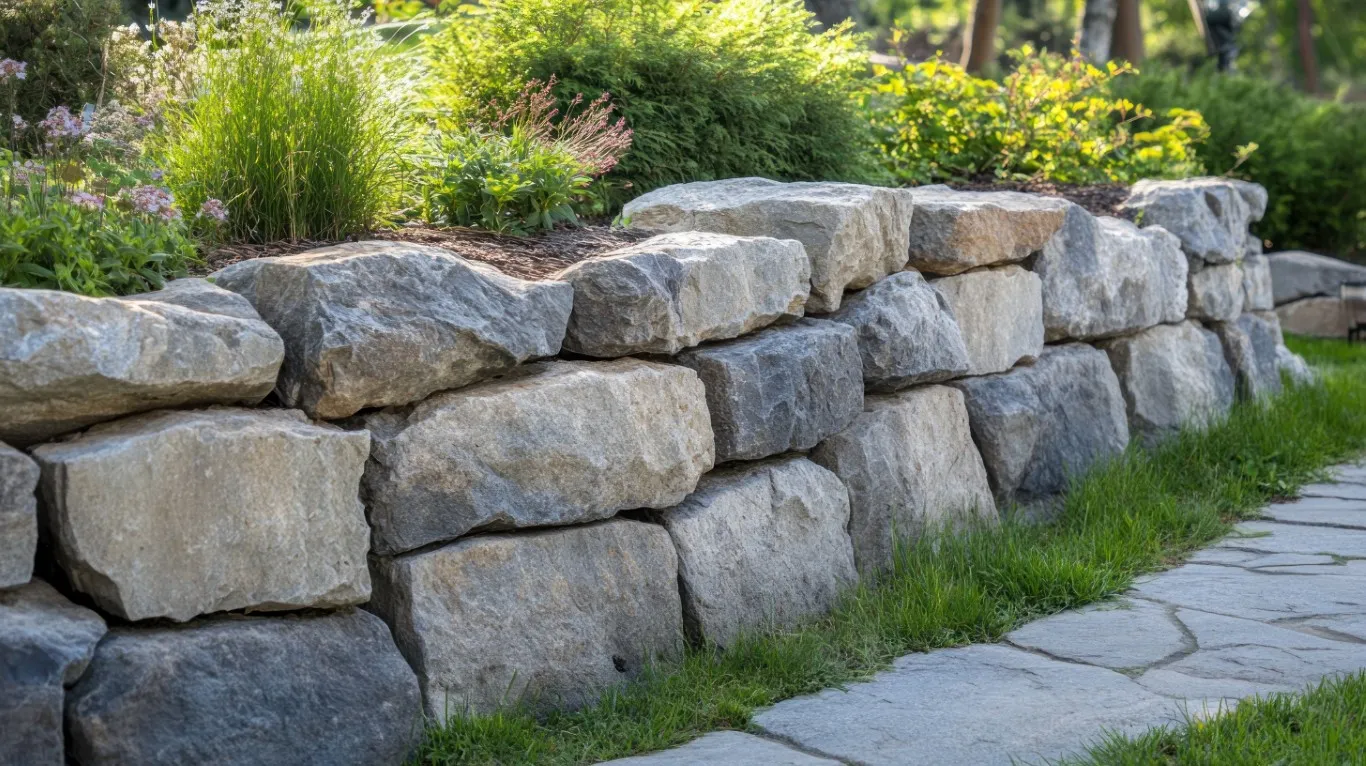


Matching Retaining Wall Solutions to Your Property Challenges
If water pools at your foundation after every rainstorm, or half your yard is too steep to use, or you’ve watched topsoil wash away year after year, you’re dealing with problems a retaining wall can fix. These aren’t just decorative landscape features. They’re engineered solutions that hold back soil, redirect water, and turn unusable slopes into functional outdoor spaces.
The right retaining wall design depends entirely on what problem you’re solving. A hillside property needs different engineering than a yard with minor erosion. A homeowner wanting a level patio requires a different approach than someone protecting a foundation from water damage.
This guide takes a problem-first approach. Instead of just listing materials, we’ll show you which retaining wall solutions work for specific yard challenges, what they cost, and when you need professional help versus when you can tackle it yourself.
Quick-Reference Guide: Property Challenge to Wall Solution
| Your Property Challenge | Recommended Wall Types | Typical Height Range | Professional Required? |
|---|---|---|---|
| Steep slope (over 15% grade) | Terraced concrete block, poured concrete | 3-8 ft per tier | Yes, if total rise exceeds 4 ft |
| Active erosion, soil loss | Gabion, permeable blocks with drainage | 2-6 ft | Depends on drainage complexity |
| Creating level patio/play area | Modern concrete, large-format block | 2-5 ft | If over 4 ft or poor soil |
| Poolside or water feature | Natural stone, sealed concrete | 1-4 ft | Yes, for waterproofing |
| Budget-limited project | Treated timber, standard concrete block | Up to 4 ft | No, if under 4 ft |
| Foundation water problems | Any with proper drainage system | 2-4 ft | Yes, for drainage engineering |
Retaining Wall Ideas for Steep Slopes and Hillside Properties
Terraced retaining wall systems are the most effective solution for properties with significant grade changes, typically slopes of 15% or greater. Instead of one tall wall that requires extensive engineering and creates a fortress-like appearance, multiple shorter walls step down the hillside, each managing a portion of the total elevation change. This approach distributes soil pressure more evenly and costs less than single-wall solutions for the same height.
For hillside properties, concrete block systems like Allan Block or Versa-Lok offer the best combination of strength and installation flexibility. These interlocking systems can curve to follow natural contours and include built-in setback angles that improve stability. Expect to pay between $35 and $65 per square face foot for quality interlocking block systems, including materials and professional installation.
Here’s a real example from a Park City property: A homeowner with a 22-foot elevation drop across 60 linear feet installed three terraced walls at 6 feet, 8 feet, and 8 feet tall. Using gray concrete blocks with a natural stone finish, the project cost $38,400 total ($640 per linear foot, or $42 per square face foot). The terraces created three distinct levels: a patio space at the top, a garden bed in the middle, and lawn at the bottom. The project required a structural engineer’s stamp because the cumulative height exceeded 12 feet, adding $2,200 to the total cost.
Stepped designs work particularly well when you want pathways connecting different levels. Switchback paths with landings every 8-12 feet make steep properties accessible and turn a liability into a landscape feature. Position landings where walls tier, creating natural transition points.
The engineering threshold matters: Most Utah municipalities require structural engineering and permits for retaining walls over 4 feet tall, or for any wall supporting a surcharge load like a driveway or building. For hillside properties where the total retained height exceeds 10 feet even with terracing, expect to involve a geotechnical engineer to assess soil stability. Engineering fees typically run $1,800 to $3,500 for residential projects.
Materials matter more as height increases. Timber and standard concrete blocks work fine up to 3-4 feet. Beyond that, you need commercial-grade systems specifically engineered for tall wall applications. Poured concrete becomes cost-effective above 6 feet because the formwork cost gets distributed across more wall area.
Erosion Control: Retaining Walls That Stop Soil Loss
If you’ve lost topsoil to runoff or notice gullies forming after heavy rain, you need a retaining wall system designed specifically for water management, not just soil retention. The key difference is permeability. Walls that stop erosion must let water through in controlled ways while holding soil in place.
Gabion walls (rock-filled wire cages) excel at erosion control because they’re inherently permeable. Water flows through the rock fill instead of building up behind the wall, eliminating the hydrostatic pressure that causes conventional walls to fail. Gabion systems cost $25-45 per square face foot installed and work particularly well on stream banks or anywhere water flow is the primary concern. They blend naturally into landscapes and improve over time as vegetation grows through the cages.
Permeable concrete block systems offer similar benefits with a more refined appearance. Products like Borgert’s eco-block or Basalite’s perma-block include built-in voids that allow water passage while maintaining structural integrity. These run $30-50 per square face foot and work well for residential applications where you want erosion control without the industrial look of gabions.
The drainage system matters as much as the wall material. Every retaining wall in erosion-prone areas needs three drainage components: a gravel backfill zone at least 12 inches wide, a perforated drain pipe at the base (4-inch diameter minimum), and weep holes or drainage gaps every 4-6 feet horizontally. Skip any of these, and your wall will fail, usually within 2-3 freeze-thaw cycles in Utah’s climate.
A Draper project illustrates the approach: A homeowner losing soil on a 35-foot slope installed a 3.5-foot tall permeable block wall with integrated drainage. The scope included excavating 18 inches behind the wall, installing drain pipe connected to a daylight outlet 45 feet downslope, backfilling with ¾-inch crushed rock, then replacing topsoil. Material costs ran $2,100, equipment rental $450, and 40 hours of labor. Total investment: $5,800, or $165 per linear foot. Two years later, no soil loss and vegetation fully established.
Plant integration amplifies erosion control. Deep-rooted perennials on the slope above the wall and ground covers in wall pockets create a living system that holds soil. Native grasses like blue grama and side-oats grama establish quickly in Utah conditions and extend roots 6-8 feet deep. Plant within two weeks of wall completion before soil dries and hardens.
For severe erosion, especially on slopes steeper than 2:1 (50% grade), combine retaining walls with erosion control fabric or coconut coir matting on exposed soil above the wall. This gives plants time to establish before the next heavy rain.
Creating Level Yard Space: Retaining Walls for Functional Outdoor Living
When your goal is gaining usable square footage from a sloped yard, the retaining wall becomes part of your outdoor living infrastructure, not just a landscape feature. Modern designs emphasize clean lines, integrated seating, and materials that complement hardscaping rather than competing with it.
Poured concrete retaining walls offer the sleekest profile for creating patios and entertainment spaces. With thicknesses of just 8-10 inches for walls under 5 feet, poured concrete takes up less yard space than block systems while providing a contemporary canvas for finishes. Costs run $55-85 per square face foot, but you’re paying for a custom solution that can include built-in planters, lighting channels, or bench seating.
Large-format concrete blocks (24x12x8 inches or larger) provide a similar modern aesthetic at lower cost, typically $40-60 per square face foot installed. Brands like Unilock and Techo-Bloc offer modular systems with architectural finishes that don’t look like standard retaining wall blocks. The key is choosing smooth, consistent textures and limiting color variation.
Here’s a real transformation: A Sandy homeowner with a 5-foot grade change across a 30-foot-wide backyard installed a curved poured concrete wall to create a 450-square-foot level patio space. The wall included integrated LED strip lighting in a horizontal reveal and a 12-foot section with a 16-inch seat wall cap. Total cost: $18,500 for the retaining wall, plus $8,900 for the paver patio. The usable outdoor space went from essentially zero to an entertainment area that added measurable home value.
The investment per square foot of gained space is surprisingly reasonable. In the Sandy project, the total hardscape investment of $27,400 created 450 square feet of usable space, or about $61 per square foot. Compare that to interior remodeling at $150-300 per square foot, and outdoor space creation delivers strong value.
Integration with other hardscape elements matters tremendously. Plan your retaining wall and patio as a unified system. Run the same materials or complementary colors. If your patio uses multi-toned pavers, pick up one of those tones for your wall. Consider how the wall caps will function (sitting wall, planter edge, lighting platform) rather than treating them as purely structural elements.
Outdoor kitchens and fire features work particularly well in retaining wall alcoves. The wall provides a natural backdrop, defines the space, and can conceal utility lines. Budget an extra $8-12 per linear foot for utility chases if you plan to add electrical or gas lines.
If you’re planning to transform sloped space into functional outdoor living areas, Utah Valley Landscaping can help design integrated retaining wall and hardscape solutions specific to your property.
Poolside and Water Feature Retaining Wall Designs
Retaining walls near pools, ponds, or in areas with high water tables face unique challenges that standard wall systems aren’t designed to handle. Constant moisture exposure, freeze-thaw cycles with saturated soil, and waterproofing requirements demand specialized materials and installation methods.
Natural stone (particularly limestone, granite, or sandstone) performs best in consistently wet conditions because it won’t degrade from moisture exposure like some manufactured products. Properly installed stone walls with mortared joints can last 50-plus years in poolside applications. Expect costs of $65-120 per square face foot for natural stone with professional installation, waterproof membranes, and proper drainage systems.
Sealed concrete, either poured or high-density block with waterproof coatings, offers a more budget-friendly alternative at $45-75 per square face foot. The key is using products specifically rated for water exposure. Standard concrete blocks without waterproofing will spall (flake apart) within 3-5 years in constantly wet conditions.
The drainage system works differently near water features. You can’t simply drain toward the pool or pond, which would introduce soil and sediment. Instead, install perimeter drains that capture groundwater before it reaches the wall, routing it to storm drains or designated drainage areas. This typically adds $18-30 per linear foot to project costs but prevents the hydrostatic pressure that causes poolside walls to fail.
Safety codes get stricter near pools. Most municipalities require walls within 5 feet of pool edges to meet specific height regulations (typically 4 feet minimum for barrier compliance) and include smooth caps without sharp edges. Check local codes before designing, as retrofitting is expensive.
A Lehi project demonstrates the approach: A homeowner building a naturalistic pool wanted a waterfall feature integrated into the retaining wall. The design used 4.5-foot-tall stacked limestone with a waterproof membrane on the pool side, a circulating pump housed in a wall void, and LED lighting behind the water stream. The 16-foot wall section cost $11,200, including the waterfall components. The result looks like a natural rock formation rather## Conclusion
Retaining walls solve erosion, drainage, and slope problems while adding structure and beauty to your landscape. Whether you need a simple timber border or a complex terraced system, choosing the right materials and design for your specific site conditions ensures long-term performance. Utah Valley Landscaping specializes in custom retaining wall solutions that address your yard’s unique challenges while enhancing your outdoor living space.
Frequently Asked Questions
Q: How much does a retaining wall cost per linear foot?
A: Retaining wall costs typically range from $25 to $75 per linear foot for basic timber or modular block walls, $75 to $150 per linear foot for natural stone or decorative concrete block, and $150 to $300+ per linear foot for poured concrete or engineered stone systems. Height, soil conditions, drainage requirements, and site accessibility significantly impact final costs.
Q: Do I need a permit to build a retaining wall in Utah?
A: Most Utah municipalities require permits for retaining walls over 4 feet tall or any wall supporting a surcharge load (like a driveway or building). Walls near property lines, steep slopes, or easements often need permits regardless of height. Contact your local building department before construction, as unpermitted walls can result in removal orders and fines.
Q: How long do different retaining wall materials last?
A: Treated timber walls last 15 to 25 years, modular concrete blocks last 50 to 100 years, natural stone walls last 75+ years with proper construction, and poured concrete walls last 50 to 100 years. Longevity depends heavily on proper drainage installation, foundation preparation, and local freeze-thaw cycles.
Q: What is the best retaining wall material for sloped yards?
A: Modular concrete blocks and natural stone work best for significant slopes because they allow for stepped or terraced construction and include built-in drainage features. These materials accommodate grade changes better than rigid poured concrete and provide flexibility if ground movement occurs. Terraced walls also reduce hydrostatic pressure on each individual wall section.
Q: Can I build a retaining wall myself or should I hire a professional?
A: DIY installation is practical for walls under 3 feet tall with minimal slope above them, using modular blocks or timber. Hire professionals for walls over 3 feet, walls on steep slopes, walls near structures or property lines, or situations requiring engineered solutions and drainage systems. Poor construction leads to expensive failures.
Q: How far should a retaining wall be from my house foundation?
A: Retaining walls should be at least 2 to 3 feet from house foundations to prevent water accumulation and foundation damage. This spacing allows for proper drainage installation, maintenance access, and prevents additional lateral pressure on foundation walls. Closer placement requires engineer approval and specialized drainage systems.
Q: What causes retaining walls to fail and lean forward?
A: Retaining wall failure typically results from inadequate drainage causing hydrostatic pressure buildup, insufficient foundation depth or compaction, lack of proper backfill material, missing or damaged geogrid reinforcement in taller walls, and frost heave in cold climates. Poor soil conditions and walls built too tall without engineering also contribute to failure.